Tuesday, December 10, 2013
Inauguration of Hornby Class 08 Shunter
Yes, you read it right! Hornby DCC - OO scale (1:76)!
My best railroading buddy Rohit waited for a month or so to inaugurate his newly acquired Hornby Class 08 diesel electric shunter with sound. So this Sunday (Dec 8th) I went to his place - we had set up a mock layout with a basic inglenook and a loco shed, put some structures in place (he has built a lot of very nice and detailed structures from Scalescenes), plugged his Hornby Elite, connected the points using Hornby's tremendously easy spring electric clips... and voila! we were all set to run trains! It took us 45 minutes at the max to build this mock-up and run trains!
Here is a quick video of this mini-layout mockup that we made. It's made on a 2'X4' base-board to make it in the genre of small layout in OO Scale! What a fun it was!
Tuesday, October 29, 2013
Crates, Boxes and Barrels
Got back to the layout after 2 months - took a full day to clean the tracks and get rid of the dust deposit (though the dust is possibly the best weathering material I have ever seen!).


Given everything that is going on with my life (change of job, relocation etc.), I decided to take baby steps in terms of model railroading. So this update is not really much of an update, but just to make me feel better that I am doing something!
I started with painting the wooden crates, boxes and barrels - this was pending for a long time. And then I just spent some time clicking some of my favorite angles.


Sunday, August 25, 2013

Sunday, July 14, 2013
Detailing of the port
This task has been kept pending for a long time, so I had to do something.

Now here is the boat yard:

Container portal:


Main quay with Severus:

Birds eye views:


4 major elements if the new detailing: The pillars, the ladders, the tires and the bollards:

Long story short, the major task was to make the pillars. So first I had cut thin (4-5mm) strips of thick 2mm cardboard and painted them - a combination of unbleached titanium white, black, burnt umber and Indian red in heavy matte medium mixed in unequal proportion to bring the rusty, weathered look. Three on the right hand was for the boat yard - wood pillars.

Now here is the boat yard:

Container portal:


Main quay with Severus:

Birds eye views:


4 major elements if the new detailing: The pillars, the ladders, the tires and the bollards:

The new building in town!
Well, I thought I would make some great progress in those couple of days I took off from work, but all that I could manage is basically complete a structure - just one! But yes, what a project it has been!
I purchased a couple of scalescenes.com kits (nearly 2 years back) to build some brick structures for the town of Wrightsville - common row houses and a corner shop. The focus was to make this one of the central pieces of the layout - make solid interior detailing, put a lot of street side details around it and make some unique scenes.
So here it is - the building and the scenes:
First the building from the corner - two shops - one grocery and a fish 'n' chips take away shop. Notice that apartment entrance right in front of the factory - bay window, graffiti on the wall - hard to believe it is a paper kit!


Now going towards left and zooming in, here is what we see:
Lizzy, the attendant in the local small grocery store Ducketts is cleaning the floor right before closing. In the floor above Mr. Shaw had his long time friend Simon Green visiting him for an evening drink and some serious discussion on books and arts. Mr Green does justice to his name by wearing a suit of the same color and he really is not inclined to accepting that he looks awful in that suit!

Here is Mr. Shaw again with his favorite blue bottle of scotch. You can spot a large peg in front of him (it is as large as 0.75mm dia and less than 1mm height!)

On the second floor, however, there is romance brewing! local college student Dan Andrew had his new girlfriend visiting this evening! We expect the fancy floor lighting to be switched off very soon!!

Here is Dan and his girlfriend with a beautiful painting in the background, and Mr. Green in his awful green suit. If you look carefully, you can spot the whiskey glass in his hand.

As mentioned before, there will be more details and scenes to be added to this building slowly - so stay tuned! :)
I purchased a couple of scalescenes.com kits (nearly 2 years back) to build some brick structures for the town of Wrightsville - common row houses and a corner shop. The focus was to make this one of the central pieces of the layout - make solid interior detailing, put a lot of street side details around it and make some unique scenes.
So here it is - the building and the scenes:
First the building from the corner - two shops - one grocery and a fish 'n' chips take away shop. Notice that apartment entrance right in front of the factory - bay window, graffiti on the wall - hard to believe it is a paper kit!


Now this photo shows all the interior scenes made so far. We will visit the scenes in the corner shop building in detail below, but the scene around the Fish 'n' chips store is not yet complete. Inside we have the owner and an attendant, and outside we have the resident cat licking her paw! But these characters are yet to be develped.

Now going towards left and zooming in, here is what we see:
Lizzy, the attendant in the local small grocery store Ducketts is cleaning the floor right before closing. In the floor above Mr. Shaw had his long time friend Simon Green visiting him for an evening drink and some serious discussion on books and arts. Mr Green does justice to his name by wearing a suit of the same color and he really is not inclined to accepting that he looks awful in that suit!

Here is Mr. Shaw again with his favorite blue bottle of scotch. You can spot a large peg in front of him (it is as large as 0.75mm dia and less than 1mm height!)

On the second floor, however, there is romance brewing! local college student Dan Andrew had his new girlfriend visiting this evening! We expect the fancy floor lighting to be switched off very soon!!

Here is Dan and his girlfriend with a beautiful painting in the background, and Mr. Green in his awful green suit. If you look carefully, you can spot the whiskey glass in his hand.

As mentioned before, there will be more details and scenes to be added to this building slowly - so stay tuned! :)
Saturday, June 22, 2013
Seeing your name in print... it's magic!
Well, more I fall in love with this hobby, more life takes me away from it!
Can't believe that I am putting something up in this blog after 3 months! This is the longest break so far (and literally so, because there is absolutely no progress on the layout since February this year). I just hope that I manage to finish this layout now by this year end.
However, there is one good news - our first publication in N scale Magazine. Thanks Joe Warren to build the initial contacts and then a huge thanks to Walt Huston for guiding me through the process.
So, here it is - our brief history of falling in love with this hobby, and then a consolidated history of building Wrightsville Port - all in super quality glossy magazine paper! Published in two parts: July/August and September/October 2013 issues of N scale magazine: http://nscalemagazine.com/index.html
Here is a sneak peek for people visiting the website. I would welcome your comments and feedback on the article! :)

Saturday, March 16, 2013
New Video
Well, after I uploaded this big a** video in YoutTube I noticed that the damn sound is not working! It's frustrating how these teething technical issues waste your valuable time and money!
Anyway, here is the video anyway, with an alternative soundtrack of Clay Jenkins, called Rails - directly pulled from YouTube. :)
Anyway, here is the video anyway, with an alternative soundtrack of Clay Jenkins, called Rails - directly pulled from YouTube. :)
Sunday, March 10, 2013
More detailing around the lighthouse
Yesterday added more bush, shrub and undergrowth around the lighthouse and the tunnel. Also added the froth and foam on the water - primarily along the shoreline. I added the railings on the trestle as well.


These additions make the scene around the lighthouse complete. Next in focus is completing the grain facility, oil facility and coal discharge facility.


By the way, I received my last order recently. Though it mostly contained detailing and scratchbuilding stuff, there is one that does stand out!

This is Kato container handler. The model does depict a little older time, so works well with my theme. Decent model for it's price.
Oh! I had some visitors yesterday, and got some unexpected help! Mouli's sisters lent us a couple of pairs of good hands to put the base coat on the tiny N scale crates and boxes! Thanks Aritrika and Sucharita! :)

Monday, March 4, 2013
Sunday Night Railroading Fun!
Long time railroading friend Rohit and Divya came down to Wrightsville Port for evening full of railroading fun! We spent a great time talking about model railroads, admiring his new acquisitions from Hong Kong - these were some great train and vehicle models that he found there during a recent trip. I also got a set of 6 N scale bus as a generous gift - thank you Rohit!
Here are a few photos of Rohit running the trains and the buses I got. You can follow his great collection in his page: (https://www.facebook.com/tinytown.in and http://turquoisechill.blogspot.in/) where I hope he will showcase his Hong Kong loot very soon!


Thanks for the coming, Rohit and Divya, next stop, our visit to Tiny Town, and hopefully set up your HO/OO Layout! :)
Sunday, February 24, 2013
Detailing...
Though there are a lot of big projects that are pending in Wrightsville Port, it is sometimes a daunting task to be continuously involved in complicated, time consuming tasks - especially when this year started with a horrifying work pressure.


Once the gel dried, I painted the peaks and rises green, and added white paint to simulate foam. Once dried, added multiple coats of the the gel medium to make the surface more reflective.


So, since the beginning of this year, I have taken a more relaxed approach till things settle down a bit and I can concentrate on the bigger tasks. So here are the updates:
First, I wanted to cover that ugly bit of white foam still peeping out beneath the Coverall Paint's factory and bring some more life to the layout. So I continued with the sea side retaining wall beyond the limit of the boat yard, sprinkled some greenery around, made a bench and added a couple of figures:

After that I added a safety railing and a stair case to the scene (though the stair case is very hard to see from the normal viewing angles):

Coming to the other side of the layout, I made some considerable progress to bring the trestle closer to finish. Painted the trestle still gray, applied heavy weathering strokes all over, and then covered the top with wood planks to model the walk-way. I also added a lot of bush, shrubs and undergrowth around the trestle to complete the scenic portion around it as well.


The last bit of progress is one of the most critical one for this whole project and actually a part of a much bigger chunk of work. Given the scene is over 95% complete in the area around the lighthouse, I decided to get my hands dirty and start with the water!
Now, I decided to dodge all popular methods of modeling water in model railroading world, and picked something that is used primarily in ship modeling side of the pond - Acrylic Gel. I started by giving the base a final coat of black, and a mix of gray, black and yellow occur for the edges. I used a shade of dark gray for the transition.
Once the paint dried, Mouli started putting dabs of the acrylic gel on top of it - we used Liquitex high gloss acrylic gel - the product is very similar (might be even the same) to Woodland scenic's model water product, just a lot cheaper! After making a fairly uniform application, she started creating the waves. We went for a little bigger waves - simulating just the beginning of the high tide where water just strarted returning to the shore. You can see all the joy in Mouli's face given she got the job to dab some paint around!
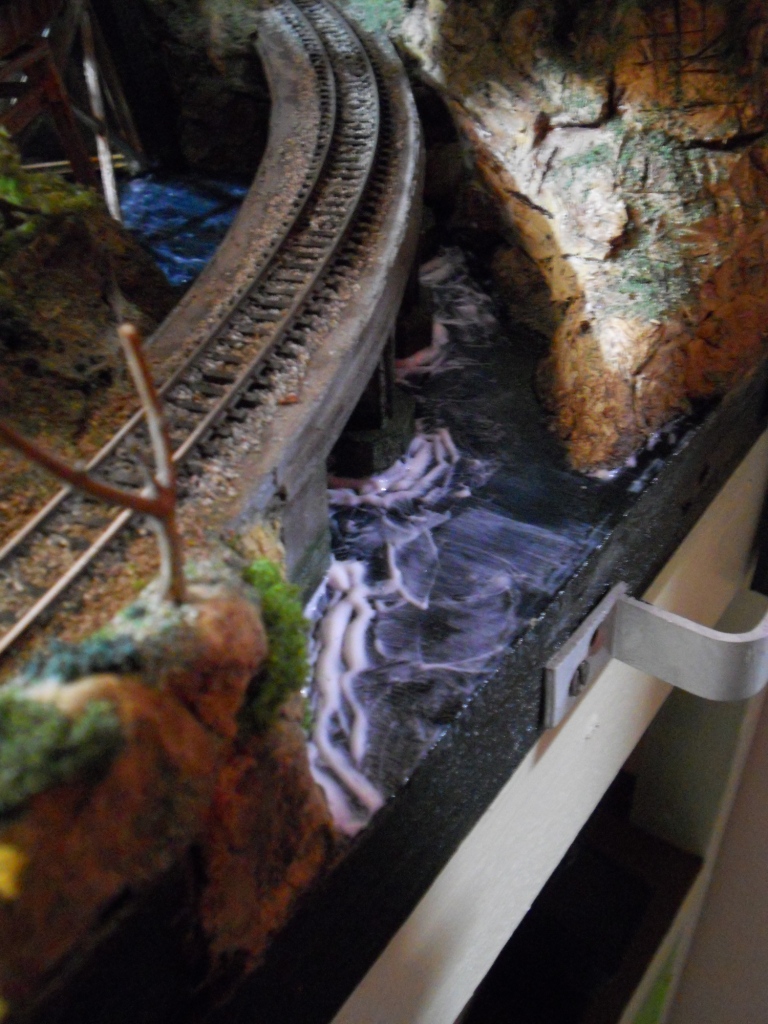

Once the gel dried, I painted the peaks and rises green, and added white paint to simulate foam. Once dried, added multiple coats of the the gel medium to make the surface more reflective.


Though it looks decent, honestly, we don't think this is the best that we can do. We are planning and experimenting to bring more depth and realistic effects in our second attempt on top of this.
Sunday, February 3, 2013
Rail fanning in Wrightsville Port
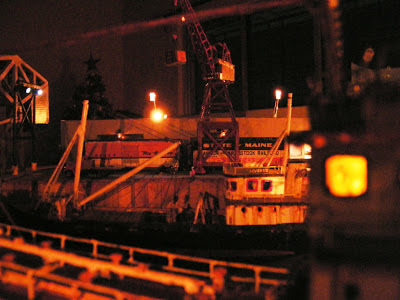
In the last one month there is virtually no addition/progress to the layout, but I have spent quite a bit of time with it nonetheless. Had a few visitors to see the layout, spent time repairing and maintaining small small things that were kept neglected for some time - I am actually in that phase of the layout where the required activity level has reached its peak - A sharp increase in maintenance time and frequency as well as considerable new additions in the pipeline, given some parts of the layout is nearly complete it is also more interesting to do rail fanning, an increased knack to find more and more switching and operation challenges... overall this phase is demanding most time than it ever had before, or will, when the layout is complete.


Now here are some shots and videos for the readers of the blog to take part in all the fun - Operations in Wrightsville Port in a foggy and mystic night! :)


Wednesday, January 2, 2013
More Lights
Happy New Year to all my railroading friends! :)
To start the new year with good spirit, here is the progress since the Thanksgiving vacation. Well time did fly in this last one month!
My focus is to install more lights in the existing part of the layout at the moment. All my high voltage (12-16V) lights are installed, so all that I am left with are LEDs and 1.5 v micro bulbs.
First, two spot light on top of the freight house facing the loading dock. This are 2mm Model Power Micro bulbs on top of 2mm dia aluminium tube and inside a thin cardboard housing, having aluminium foil as reflector. I wouldn't say that they serve a great purpose in lighting the area (which you can't expect from a 1.5V/2mm ulb anyway!) but they are very nice cosmetic touch with a great deal of realism.
In the photo above, you can also view the "actual" spot lights made of a couple of white LEDs and you can spot that on the far left of the photo, right in front of the bridge. These twin 3mm LED white spot lights actually make the area light up!

Now, the next bit were a couple of spot lights on the jib of the cranes:


Both are Mitey Lites 1.5 mm/1.5V micro bulbs in thin card stock housing and aluminium foil reflector inside. In the photos, you can spot the thin wires if you look carefully. The connection to these lights were done through the rails on which the cranes stand. Here is an overall photo:


To start the new year with good spirit, here is the progress since the Thanksgiving vacation. Well time did fly in this last one month!
My focus is to install more lights in the existing part of the layout at the moment. All my high voltage (12-16V) lights are installed, so all that I am left with are LEDs and 1.5 v micro bulbs.
First, two spot light on top of the freight house facing the loading dock. This are 2mm Model Power Micro bulbs on top of 2mm dia aluminium tube and inside a thin cardboard housing, having aluminium foil as reflector. I wouldn't say that they serve a great purpose in lighting the area (which you can't expect from a 1.5V/2mm ulb anyway!) but they are very nice cosmetic touch with a great deal of realism.

In the photo above, you can also view the "actual" spot lights made of a couple of white LEDs and you can spot that on the far left of the photo, right in front of the bridge. These twin 3mm LED white spot lights actually make the area light up!

Now, the next bit were a couple of spot lights on the jib of the cranes:


Both are Mitey Lites 1.5 mm/1.5V micro bulbs in thin card stock housing and aluminium foil reflector inside. In the photos, you can spot the thin wires if you look carefully. The connection to these lights were done through the rails on which the cranes stand. Here is an overall photo:
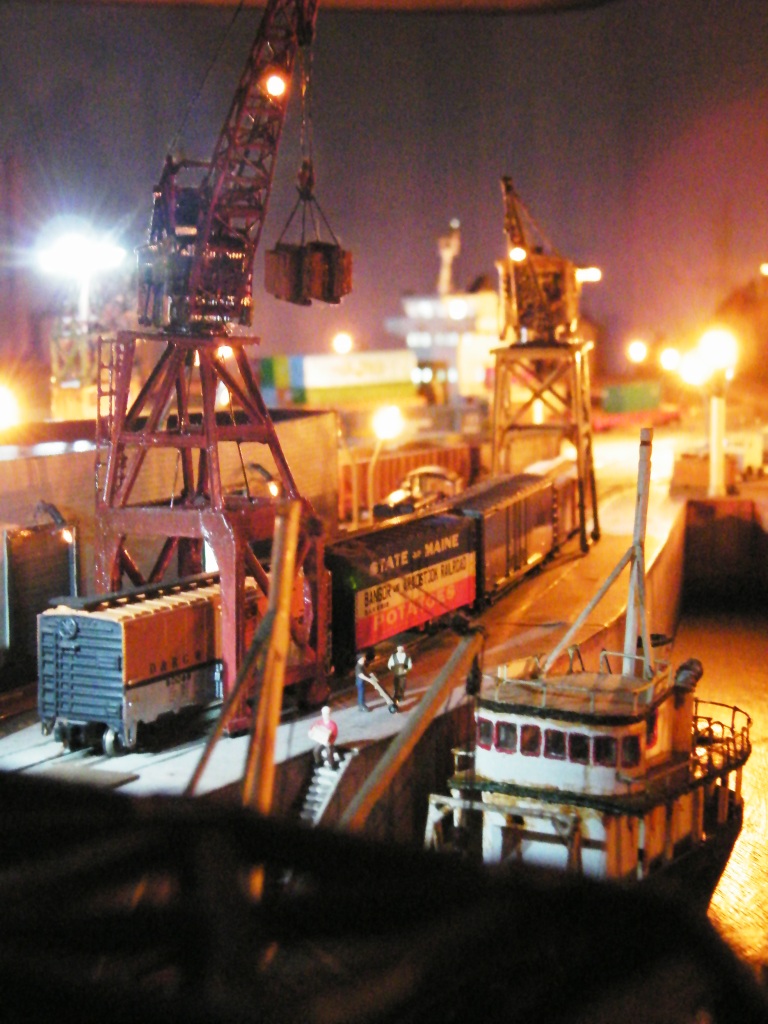
Now, the last bit was a flood light, a glimpse of which you can see on the picture above. For this one, I made a lamp head with six 3mm white LEDs on a 110mm tall tower.

I have also changed the color scheme of the super structure lighting of the container ship, Betelgeuse and changed it to white from yellow. Good quality yellow LEDs are extinct in this part of the world and I didn't have enough to replace the burnt ones.
At last, here is a view of the whole port from about 500 yards into the Atlantic!

Subscribe to:
Posts (Atom)