Well, at last I could again start with the better part of the hobby - scratchbuilding! This one is technically a kit bashing project - but it's such an extreme case of kit bashing that the line between kit bashing and scratchbuilding become very thin in this case.
I needed a trestle for my coal discharge portal approach. Now, it could have been easier for me to build a wood trestle, but I wanted a steel trestle instead! That too a very
unimpressive trestle that ramps up to an age old top discharge, hopper to barge coal un-loader. The unique problem in building steel trestle/viaduct is the parts - the plate girder spans, bents and the braces - all have to have appearance of steel. Now, I wanted a little easy solution, so I went for Micro Engineering Steel Viaduct kit instead of buying separate I-beams and cross braces of different dimensions.
In the picture below, you can see the main parts to build two double-bent steel towers , each 8 inches tall in N scale. It's a great kit and it would been really exciting just to join the pieces and make a tall trestle in a couple of hours or so - but in my case it was just not that simple. :(


For this trestle:
- There is a odd 11" curve to begin with. The kit is not designed for such sharp curves.
- The trestle has nearly a 7% elevation.
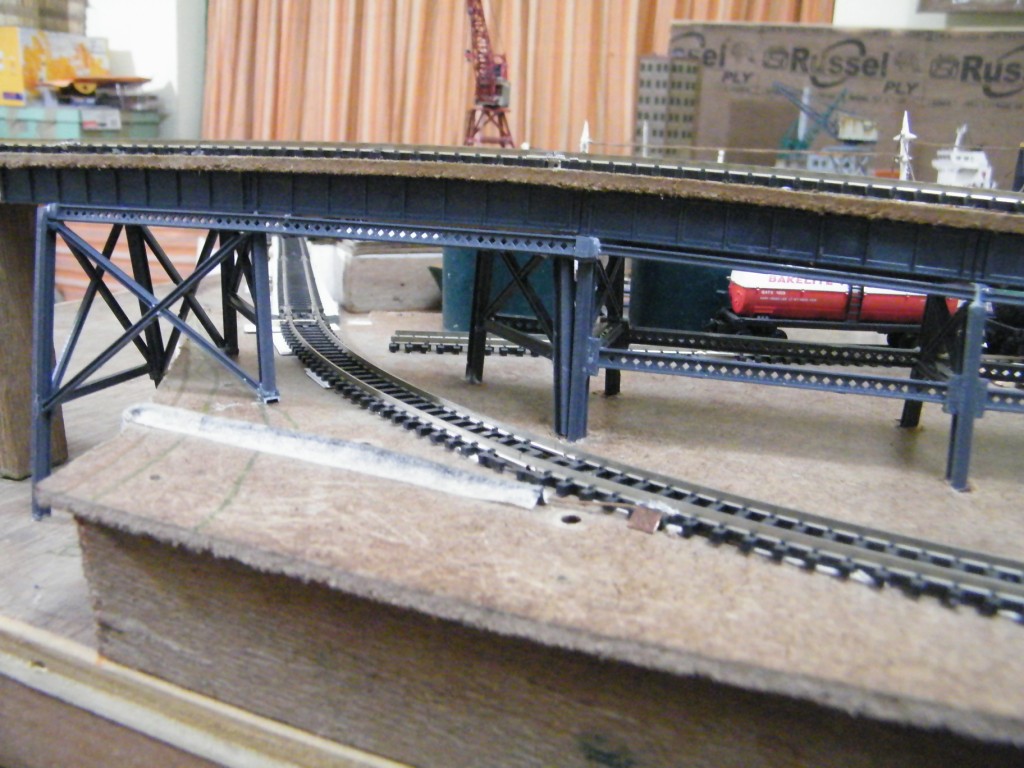
- As the picture below depicts, there is an odd jump (or rather reduction) in height when the bridge actually connects the two sides of the land - 1.5". Given there is not much of clearance between the land and the bridge modelling the trestle in that section would be tough. Moreover, the trestle takes another jump in height at the end of it while connecting to the discharge portal.
Solution? Cut them all in different sizes and make them match the given specs! I had removed the top one section of the bents to handle the sharp curve and to match the width of the trestle. Then I've drilled small holes on the baseboard to hold the bents. distance between the bents are kept exactly as the width of the braces in the kit, but the inner side of the curve had to be modified. Here is a series of pictures of the trestle after the first night. God it was tough!


Now, I have had laid tracks already and used a series of Jenga block for a strong base - kind of my own version of plate girder spans - so I would not be using all the parts to build the spans. I would just use the plates and stick them on the Jenga blocks as a cosmetic modification.
Next morning, I added the cross braces to the small bents to make it look more like a trestle.

Then there was a bigger problem - the span over the main line. As you can see - the span over the mainline goes through a pretty broad curve. So I need nearly double the regular span to connect to the last bent of the trestle on the water before it joins the discharge portal. I wanted to put extra heavy duty bracing for this, having support from both the bents.


Now I thought this is the end of it, and then I started writing this blog tonight after returning from work. When I revisited the pictures, I realised something - that last span is unrealistic from engineering perspective. If that span would have connected to double bent tower, it would have made sense, but to a single bent it is definitely a weak bridge. So I rushed back to the layout, took the remains of the kit and found to my relief that I still have some parts of the bents left. I decided to put two diagonal bents on two sides of the track and then connect them with braces. And, after over three hours this is what I had:


Well, this might not be the Eiffel Tower, but a small port in '60s North Carolina was not really known for the modern engineering marvels, was it? Now I am pretty satisfied with how this turned out. Most of this trestle will be partly hidden in bushes and trees, and as I imagine it after the model is complete - will be a very unimpressive steel bridge which is just perfect for the model.
Next step - finishing the plate girder spans - some of which will have to be made out of card board since i do not have enough from the kit to cover the whole bridge.