Saturday, December 13, 2014

First Professional Photo Feature of Wrightsville Port

Well, this would be an unlikely place where you would see a model railroad feature - the Stuff Magazine! However, I was approached by them about a couple of months back mentioning that they are doing some Photo Feature of all the notable layouts in the country, and they are interested to include mine in the list, as I was referred to them by one of the most prominent railroad enthusiasts in arguably the best model railroader of the country, Vikas Chander. Needless to say that it did sound great, and I didn't give a second thought about it!

Vaibhav and Puneet from the magazine visited us on Nov 16th on a bright Sunday morning. It was a lovely day and the trains and the ships had all the attention they could get for over 4 hours! Have to say that them and the little people looked really happy! Vaibhav, himself is an admirer of model trains, tagged Puneet along for some of the other prominent model railroads as well.

Without much ado, here are the photos:

The cover of the feature:


Kalka Simla Railway by Ranjeev Dubey: Perhaps the only truly Indian layout in the country of this size and this level of focus on detail. I myself had a quick visit to KSR in September - details here.


Never Enuf by Adesh Grover: A fantastic Garden Railway - one of the very few in the country.


Hercules Village by Mani Shaunik


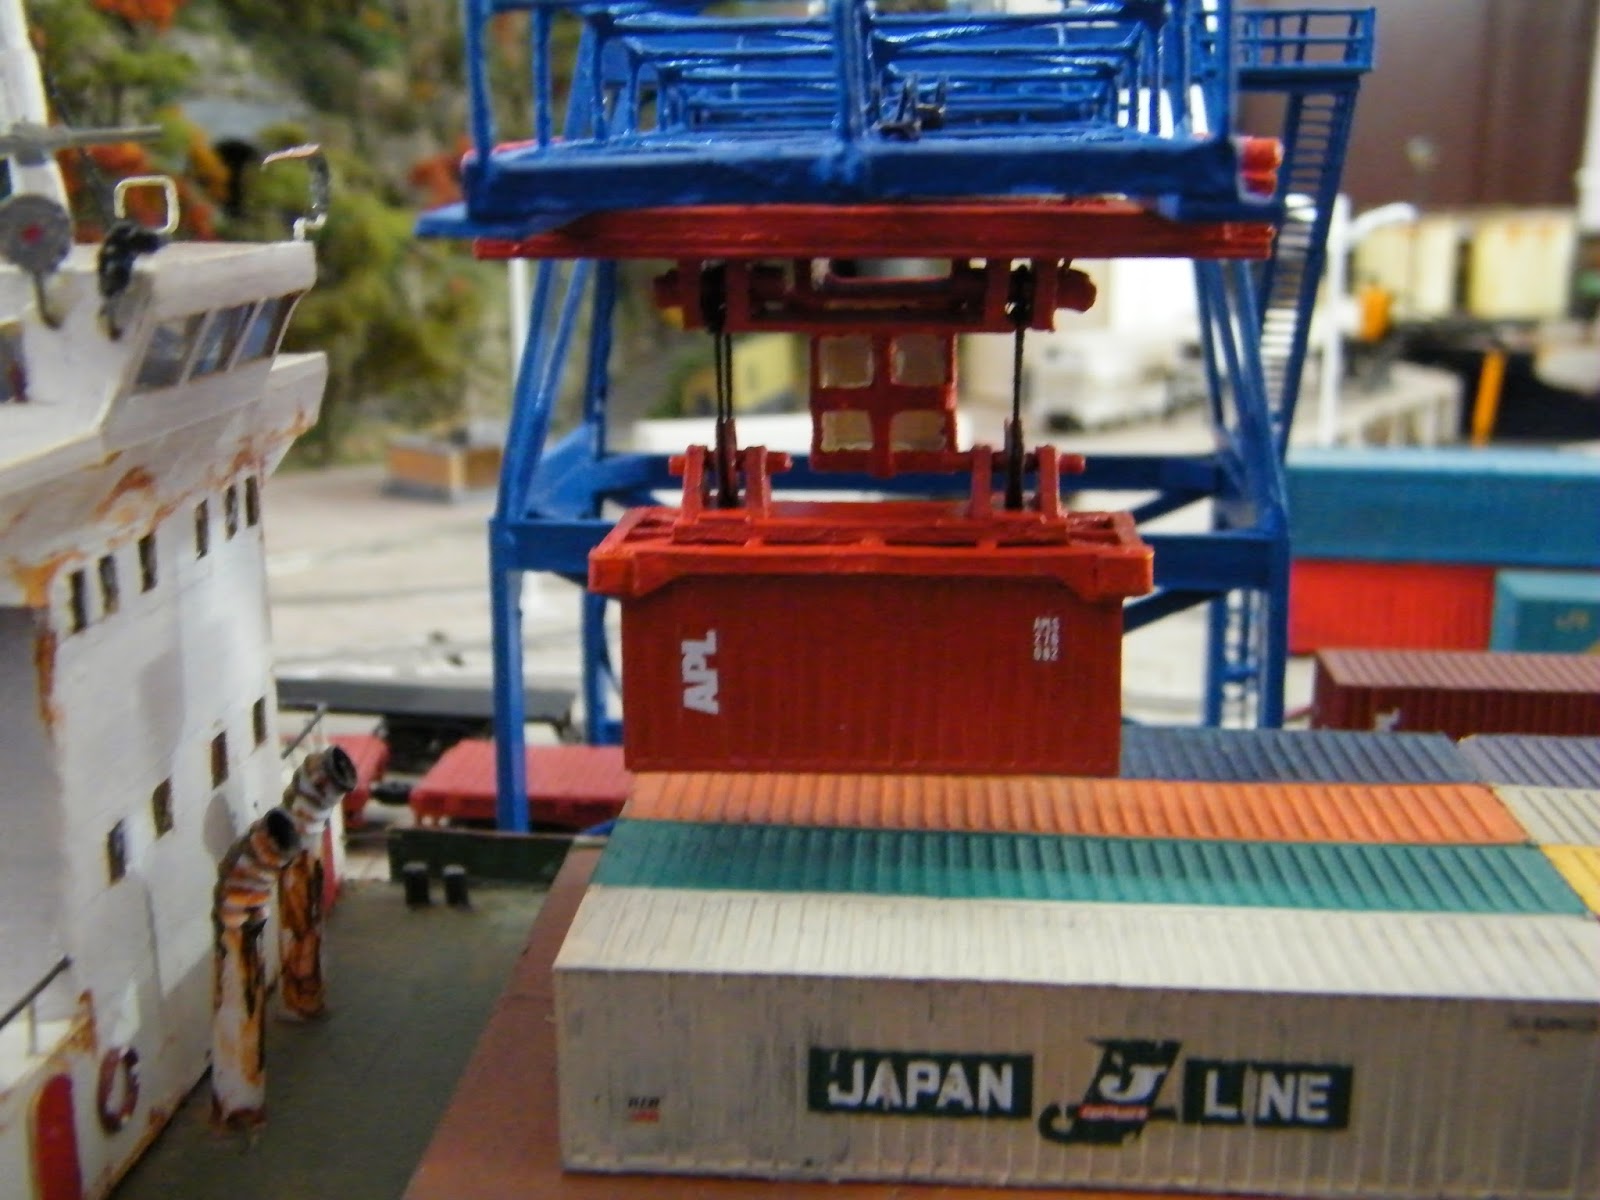
And finally... the itty-bitty Wrightsville Port! Well, if you are reading this post, I hope you need no special introduction to this one! :P


I think the biggest miss in this one is Vikas' Abendstern Nebenbahn, but hey, they gotta keep a separate feature just for that! :P


Wednesday, September 10, 2014

Weathering Rolling Stock and Loco

This was again a long pending task on my layout that I managed to start last Saturday, and made a good progress in just two days.

I don't have an airbrush, hence I used something rather unconventional - dry pastel which proved to be very effective, and in some essence more versatile than an airbrush.

The method was very simple - take small amount of matte varnish and spread it all over the body of the rolling stock/loco. Then use a flat brush, rub it on the block of dry pastel of suitable color (I used earth, white, black and rust), then dab the powder on top of the wet surface. Then move the brush rapidly in vertically and down motion till you get a dusty, matte finish. Repeat this process across all portion of the rolling stock, including the trucks.

The matte varnish and the natural property of pastel will give a very nice dusty finish. The powder also gets inside the cracks and crevices of the rolling stock and truck, just like the real thing and reveals the details of the model very nicely.

Note that the rust is modeled using acrylic paint - a mix of brunt sienna, Indian red and yellow ochre, and then the appropriate places where rusted using a size 00 brush


And here are some before and after shots.


It's surprising how much of extra detail that I can see now in my locos and rolling stock that I could never spot so easily before. I am confident now that weathering is mandatory for all smaller scale - smaller the scale, more important it is!

Saturday, September 6, 2014

A Visit to the Kalka Shimla Railway

This week an unexpected opportunity presented itself while I was on a client visit in Delhi. Somehow the day ended early, and while I was contemplating about options to spend a boring evening, I received a warm invitation from Ranjeev Dubey, one of the very few 'proper' model railroaders in the country, to spend the evening railroading. There was a scheduled meet later in the week where the small model railroad community of Delhi would meet at his place, and I was a little disappointed that I would miss that by just 2 days. So, when I received this invitation I was overjoyed.

And what a evening it was! Ranjeev has been making model railroad since late 80s, and just like me he also started with N scale. Over the next nearly 30 years, he has modeled in all popular scales - N, HO and O. He is the only model railroader in the country who models in narrow gauge - HOe and On30, and possibly the only railroader in the world who is building a true Indian Railway perfected as per the prototype.

Kalka Shimla Railway is a one of a kind, authentic replica of the prototype of the same name, spanning over two levels. Built in HOe and depicting the 1960's Shimla this layout has everything Indian about it - starting from the stations, the buildings, the scenery, and most importantly, the people. You can easily spot sari clad women, sardars with turban and typical Indian commoners in every nook and corner of this layout! Not to mentioned authentic Indian vehicles, animals, carts and buildings. There should be a special mention of the two prominent temples in the layout, one of which is a fantastic model of Tara Devi temple, and you can also spot the old ruins of temples crafted with extraordinary skills! A heavy scratchbuilder, Ranjeev has definitely made some remarkable and original scenery in this layout. And he achieved all this in just 3 years, starting the layout in 2011. Not to mention that this specific bit of statistics does shake my confidence a bit that I haven't been able to complete a less than 18 sq foot layout in nearly 4 years!

Known as RDX in our small railroading community (well you can pretty well imagine the character with that name!), he is a true inspiration. And yes, I am very seriously considering moving to HOe for my next layout, and definitely would like to pick an Indian prototype. What comes to my mind first? Well, you should know - Darjeeling Himalayan Railway!

I did not have preparation for this to carry a proper camera. So here is a short video of whatever I could capture with my shoddy phone cam. I had a bonus pick of watching trains run on his N scale layout as well!

Thank you for everything, RDX!


Wednesday, August 6, 2014

Background scene - Port Entrance


Now that the container crane is done, I started working on the backdrop. Used Scalescenes container paper kit to make some container stacks, and a poster painting of Black Mountain, NC as the port approach. Also used Miller Engineering chain fence with barbed wire to give that extra effect.


And here is the crane again! ;)

Monday, August 4, 2014

Container Crane Building Post - 5

Well, this is sort of a late update as the container crane is actually built over a week ago.

Continuing from where we left, the next step for me was to make a counterweight. Mind it, it was not just for cosmetic reasons - given I made the trolley movable, and used metal tubes for the beam, the front part of the beam was actually heavier than the the other, and I did require a proper object for the counterweight. Fortunately, I had exactly the right piece - a burnt 12V DC motor! Never thought it would come to any use, I kept it so that one day I can use the gear attached to it! seems like it came to better use.


Once the counterweight was done, I made the ladder for the operator cabin. used the same methods as before, so there is no new technique here:


The next part was to create a simple pulley combination to lift the beam to simulate non-working period. Below are the steps:

First, I used #40 mercerized cotton, some single strand electric wire and small pieces of styrene tubes to make the rotating joint for the pulley thread:


Second, I used the Grandt Line large wagon wheels, used the same method I used to make the pulley for the spreader, I had cut a groove along the perimeter and made a solid cardboard housing for the same. Once done, fixed them on the top of the crane, took the threads over them and through the tiny holes right behind them to the underside of the top frame.notice that the pulleys are actually at an angle, just like the prototype.


Third, under the base, I just tied the two strings to a styrene rod with the help of some copper wire to keep them parallel to each other. Now, when you pull down that styrene rod (Using a a pair forceps), and lock it under the fixed pins on the main frame, the beam is drawn, simulating an inactive state.


The last part of the build were the wheels. I didn't any fancy with that - just took 4 plastic N scale wheels, cut them, and put them in a cardboard frame - that's it.


Finally, after all the pieces are put together, glued and painted, here is the final piece:


Photo at night:


Beam drawn:


Friday, July 18, 2014

Container Crane Building Post - 4

The next step was to complete the spreader.

The Spreader, as shown in the second part of this build thread, will be movable to increase variety of positions during photography session. Also, I had to arrange for a mechanism so that I can keep changing the containers from time to time.

So first, I created a cardboard frame that can simply hold my 'Fine N Scale' 20' containers from top and maintain a good grip throughout. The trick is that the inside dimension of this cardboard frame is just a tiny fraction larger than the outside dimension of the container - to the naked eye it is actually the same unless you use a caliper to measure it.You might ask how I did it without using the caliper though - simple when I drew the dimension on the cardboard with a sharp pencil, I'd cut the cardboard on the 'outside' of the line, not on it - takes a good degree of precision, true, but given I am working this stuff for so long, I think my motor skills can take those challenges! :-P


Once I tested the effectiveness of the frame by lifting and shaking it several times while it holds the container, I started building the support. I used some really old stock of Micro Engineering wooden ties.


Then I started working on the pulleys. I went for the more simplistic design add just two pulleys on two sides - given we are talking about really first generation container cranes, I think that is still prototypical. I took a couple of Grandt Line small wagon wheels, curved groove along the edge, and voila - I have my pulleys! It was then just a matter of creating simple housing for them and attaching them the the spreader.


Next step was to create the hoist mechanism on the trolley. I went for a covered approach this time, more for stability, and for the fact detailing of that part will be hardly visible. As you can notice, I had to use 'tying' it up with the trolley to ensure durability!


The next step was to create the cabin. I drew the complete dimensions on a cardboard first and then cut it precisely using my hobby knife. Once done, just folding it and gluing it in appropriate places is all that you need to do.


Next step was to paint all the components red, cut OHP sheets of appropriate sizes and create the glass cover of the cabin, and then finally put everything together to finish the assembly. Notice that I still have interiors to complete inside the cabin (awaiting orders), and kept the provision of removing it.


Finally, here is the complete mechanism to move containers to and from the ship:


Coming up - final bits of detailing - counter weight, beam draw mechanism and the links. Then I'm done with this one! :)

Friday, July 11, 2014

Container Crane Building Post - 3

The next was the electrical connections for the light. As always, for lights on the structure, I always try to be as flexible as possible and hence try to avoid soldering. The reason being, once the structure is built changing a burned bulb is hell of a task and possess much higher risk of damaging the structure itself. Often in N scale it's easier said that done, just because the size of the structures are too small and making removable 'plug' points for LEDs might make the arrangement look out of proportion - but given this one is a relatively big structure, I decided to go for it.

The first challenge was the folding beam - the connections should hold throughout the up and down movement of the beam. I created a pivot by drilling a tiny hole in a copper strip and pushing a 22 gauge single strand wire into it - it should be a tight join to maintain constant electrical connection. The main connection to the power were soldered to the copper plate. There was another distribution to the fixed part of the beam.


As for attaching the LEDs, I used 1mm X .355mm copper tubes - soldered the input power lines to them and put the LED lead wires into the other side of the tubes, as shown in the above pictures. I made arrangements for a total of 4 LEDs across the beam.


Once the construction of the beam was over, I moved into completing the tower. Added styrene ladders and railings (Evergreen Models). Used Gold medal models ladders and created a ladder cage by making tiny rings made out of single strand electrical wires and thin cardboard strips.


The next step was to complete the painting. I decided to go for Blue as so far there is no blue structure on the layout, and it is a very common color for container cranes. Below some photos:


Coming up - the last of components - counter weight, operating pulleys to retract beam, and the trolley to move containers.