Sunday, November 25, 2012

Lights!

Well, it's been over a year for some of the lamps that are sitting there in my storage, so during the Thanksgiving vacation, I decided to install them on the layout. Well, as for the methods etc. there is nothing much to explain than "drilling holes here and there, fixing the tiny lamps and wire them with the power supply", but the actual work was time consuming given I had to install quite a few at the same time. I will just go with the photos:


As you can see in the last photo, I've also made a small platform for the RDC which should help my tiny commuters get in and out of the coach! :)

More Fall Photos

Now my camera is up and running, here are some more photos of the fall colors:


Wednesday, November 21, 2012

Fall in Wrightsville Port

Well, I think this is the perfect time to model some Fall scene - so here is how Fall looks like in Wrightsville Port:

The big trees are JTT tree kits - mostly in various shades of Green, the Fall mix is JTT set of 60 1.5" - 3" tall plants, shrubs, undergrowth etc. I also included a few home made armatures that I made from dead basil plants.


I now like the way the background blends into the layout - the hill which was supposed to be a transition piece from the layout to the backdrop, and serves its purpose the way I imagined it.

These are snaps using the phone camera, as my camera battery died yesterday night - better shots of the scene and individual trees coming later. Till then - enjoy! :)

Sunday, November 18, 2012

Some wonderful holiday gifts - AFTER A LONG TIME


Well, it's been a long, long time since I indulged in some real guilty pleasure, so when one of my best friends was returning to India from Texas, I couldn't help asking her to get a few stuff for me - A small lot of some of the treasures I've been eying for ages!

Now for the sneak peek on the lot:

The trucks made by Herpa - the red and the blue heavy trucks. The depressed flat car on which the red one sits is a Micro-Trains kit.


The black and the white trucks  in the kit, well the containers are not the part of the kit of course!


Here is the rest of the lot - still in packets - trees, a couple of MT box car kits, an oil tanker, Model Power lights, WS biker gang, six Kato cars...


Now, coming to the last bit, one of my most dearest purchases so far - the Kato NW2! and I took the liberty to appoint fat Mack the job of the engineer, along with putting some black paint on the smoke stacks. Here are some photos, and a video.


I have to say it's the best switcher that you can have in N scale! Extra ordinary in detail, with a clear interior cab where you can even put a figure, very nice external detailing, excellent pulling power and slow speed performance - highly recommended for every N scaler!

And now, here is a quick birds eye view of the port - Did I mention that I completed the grain elevator in the mean time? I guess not! :)


Stay tuned for more updates... Yes, there is more... :)

Sunday, October 7, 2012

The Grain Portal in Progress

Just a couple of very simple photos, nothing special to add other than those anyway. As they say, a picture says a thousand words!


Sunday, September 23, 2012

A Model Railroading Forum in India!

Well, I have been to many Model Railroading forum, but never really spoke about those here, but this one is special. This forum is primarily focused at model railroaders from India - a close network of a diverse community who hardly talk to each other! Model railroaders from other part of the world are very much welcome too - more the merrier! :)

Here is where you can find it - I welcome all my friends and visitors of this forum to join in the forum as well. :)

http://trainaidsa.in/taforum/index.php

Wednesday, September 5, 2012

Pneumatic Grain Unloader

All right, I am off to an absolutely new build - and among all the people I know, this is something that no one has tried before. Pneumatic Unloaders are again a pioneering discoveries that started taking shape during late 50's and 60's - and a very realistic addition to any sea-rail interface that handles grain.

Just some principals and schematics to explain how it works - basically it's just a giant vacuum cleaner! Now on the internet you can find some fascinating photos of the modern equipment, but I am pretty sure the initial ones didn't really look that impressive, so I had to improvise and trace back some design photos and engineering drawings to ensure that what I am doing is prototypically correct. Also, unlike the ones returned in Google image search, mine is going to serve a pretty small facility, so am elaborate giant is possibly going to take the whole place assigned for the complete portal itself, may be including the space for the elevator and the silos! My goal was to keep the looks as simple and primitive as possible, without make it look like a toy, and keep the overall comparative size to 100 - 150 Ton/Hr range. Here is a schematic:


Coming to the build, first, I used the remains of my Micro Engineering Tall Steel viaduct to start with the structure. The structure will move on the rails and will carry the main compressor.


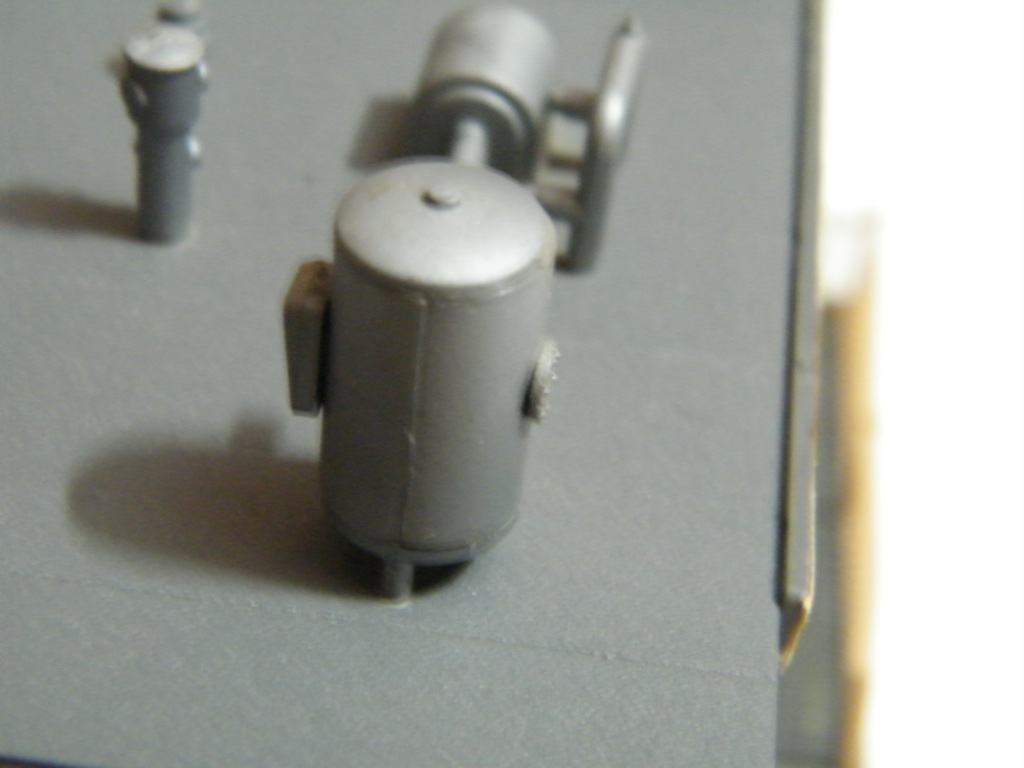
Now coming to the main compressor, I honestly wanted something ready made! Making the compressor absolutely from scratch in N scale and with card board was not going to work. Now when I was desperately looking for something to base the model on, I stumbled upon my old Model Power Coveral Paint building. And guess what I found:


Now, that was just perfect for what I was looking for. Poor 10mm tall owner of this facility would have to forgive me for this absolute shameless 'robbery!'

OK, now once the structure is in place, I went for modeling the platform. I had some good quality, hard and thin card board from a Jockey clothing package that was sturdy enough - so I had just cut it. Notice the L shaped cut out within the platform? That is for the steel wire mesh walk-way!


To model the wire-mesh walk-way, I used something that is very common in any Indian household - cheap nylon tea strainer! Well, just in case you are curious, I have strained a hell lot of stuff with that, but I don't remember straining tea - so no, it's not a big loss!


After cutting out a suitable size and pasting on the cardboard, I used Gold Medal Model broad brass ladder as railing:


After this I put the 'Compressor' in place. Come on, doesn't it look much better than on top of that stupid building!


The next thing was to create the boom - I used different dia styrene tubes, casting frame of the ME Trestle kit and a couple of parts from the Walthers roof detailing kit to make this:


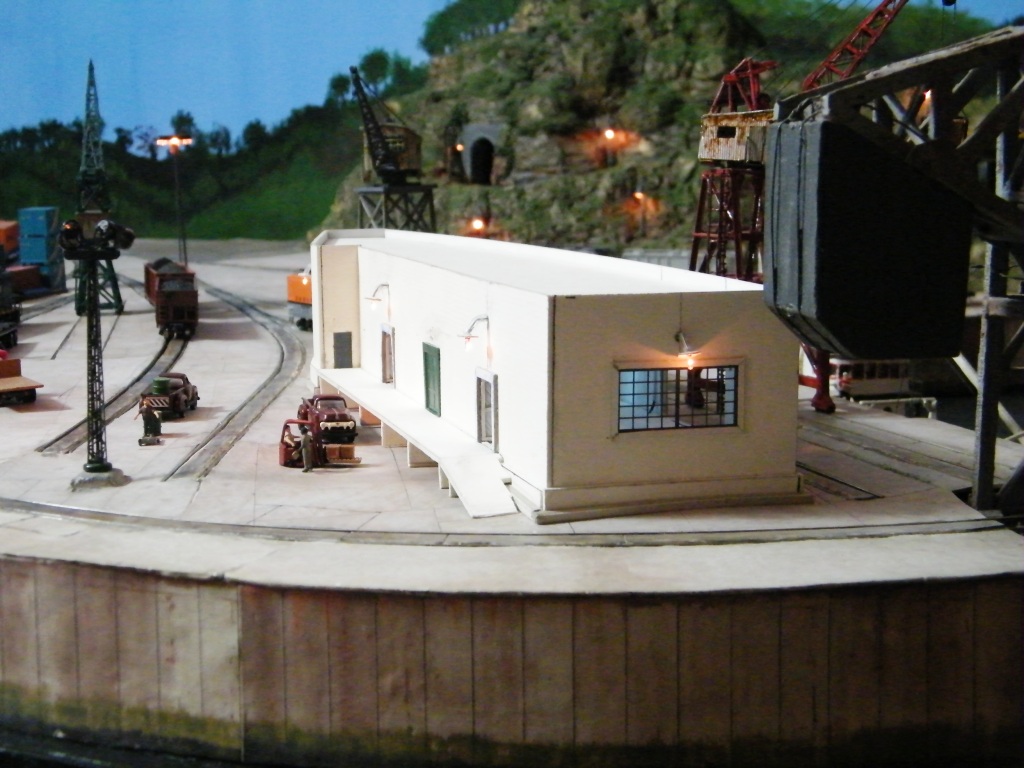
Now at this point, fixing everything to the model, this is how it looked:


Now at this point, I started worrying about the next step - modeling the transportation from the Pneumatic Unloader to the silos. To model the transportation of the grain to the silos, I decided to go for conveyor belts - the arrangements should look a much, much, much simpler version of this:
So as a next step, I put the basic cardboard structure in place for the conveyor till the end of the moving range of the unloader - basically the horizontal part of it. The next step would be the step by step steady incline to the grain silos. Also, to keep things simple, I kept it a covered conveyor model, which will have corrugated surface.

After putting the basic structures in place:


Stay tuned for the next update - it's going to take a while to complete this baby!

Tuesday, August 21, 2012

Wrightsville Port Freight house

Here is a record time build - completed in 3 days. All that is left to do is painting and a little bit of detailing. This building is going to represent the main freight house of  Wrightsville Port. For this one I am not going to bore everybody with all the step by step construction procedures. :) Just some shots and features:

Here is the top view of the building that shows it's unique shape. This building has four large shutter doors on the curved side of the building for the loading/unloading of the box cars as well as big trucks - there is a similar one for 1 box car on the other side. There is a large platform for loading/unloading of only vehicles as well.


The most challenging part in this building was definitely the lighting. I wanted to make sure that the lighting is as prototypical as possible. So I went for Circuitron's Micro lights - 1.5 mm bulbs as lamps outside the building and two white LEDs inside.


The lamp fixtures are basically the tiny coffee stirrer straws and the round shades are thin card boards punched out using a punching machine.

And just to scare you a little, here is the wiring below the building!


Now some different angles:


And here is a night shot: