Monday, December 26, 2011

New Additions

OK... Finally I have assembled the layout after 4 long months over the Christmas weekend. God these 4 months were suffocating! Trains are running again and I took the first opportunity to see my new additions in action. Atlas covered hopper, a couple of MT flat cars and the thing I was most anxious about, the Bachmann SD-45. But all of them have shown satisfactory performance.


The SD-45 has definitely changed my opinion about Bachmann, this $24 loco has very nice details (as you can see in the photos above) and it runs pretty good too. Though performance wise, I would still keep my Life-Like GP-38 on top, but I am happy with this Bachmann loco. I just hope it keeps this level of performance for a good amount of time.


Saturday, November 12, 2011

Lighthouse - after painting

All right, wifey finished painting the lighthouse. Notice that I installed a 10mm base and increased the height of the lantern house by 6mm more.


The weather vane is made out of styrene. Difficult task it was to build this!


For the black ribbon, we used muscle tape masking for the streight, uniform border.


Monday, November 7, 2011

Lighthouse: Contnd.

It was a busy weekend with friends and family and a bit of socialization, so not much of a progress on the lighthouse. My wifey added the first coat of painting on the tower and I finished the remaining paper mache work around the lighthouse and the bridge.


Now the paper will take two-three days to dry completely and become rock-solid. Then I will finish painting the earth and the rock and add ground cover, while my wife can finish painting the lighthouse.

Monday, October 31, 2011

Scratchbuilding: Lighthouse

After a long time (probably the first time in this year), I went back to scratchbuilding. And yes, it felt awesome! My immediate goal is now to complete the scenic section of the layout, primarily because it's been elven months already since I started working on this project, and it still looks like a layout that I just started building!

To start with the lighthouse I initially thought of building an octagonal lighthouse tower like the Montauk. But when I looked at the lighthouses in North Carolina, the place where the layout is based on, I found that all the notable lighthouses there have conical tower and not pyramidal. So, it was time for me to build the cone. Drawing the cone was a refresher to my engineering drawing classes, only difference was, I did not have any of my drawing equipments because I have no idea where they are! So had to do it with just a scale and a compass.


Dimensions of the tower: Base 60mm dia, top: 35mm dia. After cutting out the cone and gluing the edges together to form the shape. Notice that I inserted three stair windows as well:


Next step was to cover the top and the bottom of the cone. I'd simply cut out two circles to fit the inner dimension of both top and bottom surface, and then added a circle with a little larger dia to for a solid joint. I have also kept access for a prototypical lighthouse mechanism that I am planning to build. On top, you'll notice that there is an additional circular grove - that is for the lantern room that will be removable


Once the coverings on the top and bottom are fixed, I added the main door to the lighthouse.


By the time the glue was drying on the doorway, I built the basic structure of the lantern house. 0.2 mm cardboard and clear plastic sheet (OHP), with 0.5 mm styrene rods as support:


Next step was to build the build the guard railings outside the lantern house. I took a different methodology this time as I wanted the railings to be unique - I decided to give one dense protective railing at the bottom of the main railing (A practice I saw in some tall building somewhere that I cannot recall properly now). First I used brass ladders to build this layer. Then I added some styrene rods as the support for the main railing.


Once glue dried, I placed single strand copper wire, bent in the exact dimension of the railing on top of the supports and glued it to the supports.

Additionally I also made the roof for the lantern house:


Now some shots:


Now, this is going to go to the wifey so that it starts looking all pretty and attractive. I will also throw in some advisory detailing time to time (if  I get the opportunity of course)!

Tuesday, October 25, 2011

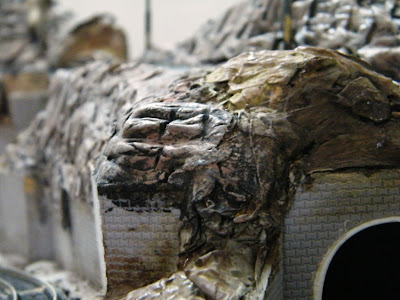
Some close-up of rocks!


First Shades of Brown and Green!

Coloring the hill and the rocks that I thought would be finished during the week, finally got postponed to the weekend. So here are a couple of pics of my wife and myself painting the rock faces (well, for my consider an additional adjective, that is 'trying', for me.)


Now, as for the first coat, we colored the rock faces bright yellow and boulders and earth as dark brown.


Now as for the second coat,it was a different story. First there was a overall general coat of mixture of gray, titanium white, gray a burnt sienna. Once the color was set, it gave an appearance of river-bed clay. Second, the rock faces were given a wash of various shades of burnt sienna, black and gray which developed the base and the crevices.

Once dried, I dry-brushed the faces with the mix of  light gray, indian red, yellow ochre and titanium white to complete the highlight. I also used indian red, titanium white and gray to dry brush the earth. well, you can ignore the gloss, since the vernish was not dried yet when I took the picture!


Once the colors dried, I could not hold the temptation to add some green to the mix. So I took some home made dark green granular ground cover for the bushes and some Hornby fine grass ground cover to sprinkle over the rock faces... and voila!


Monday, October 17, 2011

Back to the workbench!

Well, it's been an uncomfortable two months where I didn't really get any time to spend on the layout - absolutely none! Crazy work pressure, new home (and problems that come with it as a package), festive season... it's never been worse since the time I stated building the layout. So, yes, I was absent... for a long time...

But that doesn't mean that nothing really happened in the past two months! :) I got a new loco (Bachmann SD45) which changed my perception toward Bachmann to a good extent. This $25 loco has unbelievable detailing - trust me you can buy it for 25 dollars even as a dummy! it runs pretty well too... initially the noise was a little concern, but, it became far far better just with half an hour of breaking session. But was there nothing in this that reminds you that it's a 'Bachmann?' indeed... there is... the headlights are WHITE LED... yes, you read it right - white... and I am still trying to figure out on what consideration Bachmann could ruin such a great loco by installing white LED. But hey, the rest of things are so good, I have started ignoring the LED within 24 hours.

Along with the loco I had some flat cars and a covered hopper, plus some other supplies to make street lights and signals - planning to start on those soon.

Coming to the layout itself, there is some serious upgradation there as well. I was planning to put the empty space below the layout to spme good use for a long time, and just before Durga Puja, I asked a professional carpentar to take my woden stands and make top open cupboards. As of now, it stands just with a coat of wood primer, but you can get a feel of it from the below photos.


Once painted, I am hoping, this will look really good...

Now coming to the actual modeling, today I took some light approach to get back to the workbench, and that is making the rock faces on the hills, while my wife paints the bridges.

As a material I used simple modeling clay on top of the paper mache hill and used a piece of wood to carve the clay when it's still soft. This is an air hardening material, so I took one section of the hill at a time, finish the carving and carry on to the next part:


By this time my wife finished coloring the small plate girder bridge:


And after that, the road was painted a first coat of glossy black...


Now trying with some different angles, with the street lamps on:


And now finally just with the street lights: 


All going well, I am expecting that the basic scenery on the hills will be done by next weekend - but you never know. I will be facing an ISO 9001: 2008 audit this week, so nothing is certain, leave alone working on the layout...

Oh! I forgot, coloring the rocks is my wife's job, right? :D :D :D